An excellent bearing exporter with good honor
LONG LIFE COME STANDARD IN OUR BEARINGS
CUSTOMER SERVICE IS OUR TOP PRIORITY
MOVING BUSINESSES FORWARD IS OUR MISSION
CUSTOMER SERVICE IS OUR TOP PRIORITY
MOVING BUSINESSES FORWARD IS OUR MISSION

Bearings are small mechanical assemblies of enormous significance. Their purpose is to reduce the friction coefficient between parts in relative motion and ensure the machine’s long-term stable operation. Both the bearing surface and the bearing rollers have a direct impact on the usage performance, quality, and life of the bearing. Common surface defects such as wear, bruises or anomalies can cause machine vibration and noise, accelerate the wear, and even damage the machinery. Thus, diligent inspection of bearing rollers is of paramount importance.
 While most of the processes involved in bearing manufacturing have been automated, the inspection of bearing rollers and surface is still majorly based on manual inspection. Such an inspection method is not only labor-intensive, low-efficiency and high-cost incurring but is also easily affected by factors such as the resolution of the eye, fatigue and experience.
Just like in any other mechanical production process, defects are natural in the production of bearings too. Overloading, improper lubrication, contamination, and incorrect handling and installation are some primary causes of bearing defects that could ultimately lead to failure. Some of the common types of bearing defects found on bearing rollers have been enumerated below:

![]()


Face End Defects
Pitting and Contamination
Pitting is damage that is the result of contamination or foreign substances entering the bearing. These include abrasive grit, dirt and dust from contaminated work environments. The primary source of such particles is improperly cleaned housings.
Grinding Damage
Grinding is a common phenomenon observed on rolling surfaces. It can lead to shortened fatigue life and also result in critical failures in dynamically loaded, crucial components.
Shallow Recess
If recesses of the appropriate depth are not in place, the entire ball bearings might not fit as correctly as intended.
Outer Diameter Defects
Spiral Effect
If the roller bearing possesses any type of defects, an undesirable effect known as the spiral effect is observed.
Defects in any production line are quite natural and a common product of the manufacturing process. It is, however, the responsibility of the manufacturing company to ensure that quality products that meet the compliance standards reach the hands of the customers. The challenge lies in separating the defective pieces from the perfect ones. Let us now look at one of Qualitas Technologies’ clients and study how we helped them overcome their bearing inspection-related issues.
Our client’s forte is engineering, manufacturing, and marketing bearings, gear drives, belts, chains, couplings, lubrication systems, and other associated products. They offer a broad spectrum of powertrain rebuild and repair services. Our client is a key market player in their industry. Being the leading authority on tapered roller bearings, they have been extremely successful in lending their expertise to metallurgy, tribology, and mechanical systems and thus, improving the reliability and efficiency of equipment, vehicles and machinery across the world.
Defects occur naturally on the surface of bearing rollers when in the production pipeline. The common defect categories include damage caused by mechanical collisions, corrosion due to ageing, and material lacking, and grind lacking. These defects are mainly observed on the chamfers, cylindrical surface, and end surfaces.
While our client was well aware of the defects that might pop up in the production process, they had no feasible and effective way of ensuring that each of the defective pieces was successfully separated and discarded. With the production speeds as high as 3 rollers per second, it became quite apparent that human inspectors were incapable of detecting all the defects.
Such issues, if left unaddressed, could have serious repercussions. The low-quality output was damaging the brand image and arousing distrust amongst customers and clients. The defective rollers could lead to leaks, reduced lifespan and lowered efficiency, which was ultimately pushing up the recall rates.
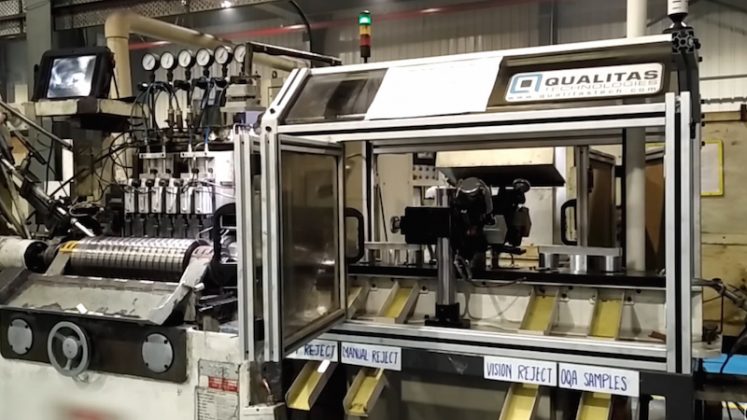
At Qualitas Technologies, we strive to help our clients with an optimized solution at the best possible costs. For this particular client, we suggested the use of AI and machine vision-based technologies to create an automatic bearing inspection and bearing roller inspection process. We implemented the solution by applying our paradigm of the 4I methodology, which is an abbreviation for Install, Instruct, Inspect and Improve.
The core of our solution was implemented in the following way:
Install
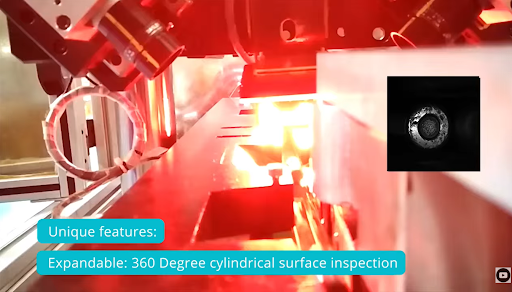
Primarily, we installed a set of three cameras at some specific angles and a red panel lighting system to best capture the defects on the rollers. We focused on the use of red lights instead of white lights to minimize the reflection on the bearing surface, which could have resulted in undetected surface defects.
Instruct
We guided the development of a solution based on the acquired images of the roller defects. We also made sure that each kind of defect was trained (in Qualitas EagleEye® Platform) with the help of a different set of images.
Inspect
The AI-based Anomaly Detection Technique was used to accurately identify the defects on the roller’s body and face.
Improve
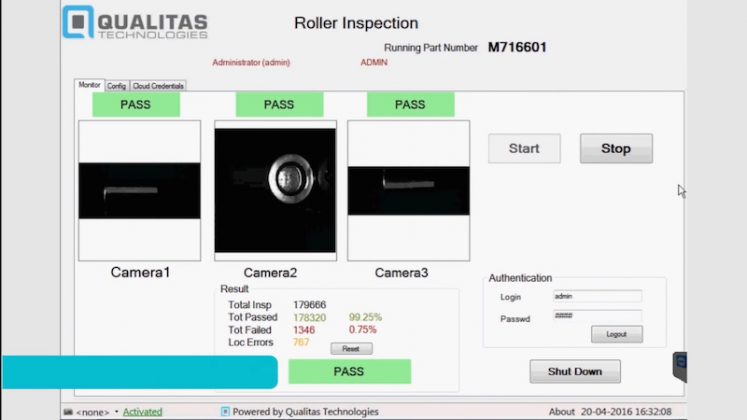
Deep Learning (DL) programs were built to train the machine vision system to better understand the different types of surface anomalies on the bearing rollers. Also, the results can be displayed on the user interface in real-time.
Coming up with a system that was fast enough to fit in properly with fast production speeds as well as to train that model to inspect a massive variety of defects while maintaining an accuracy of over 85% was a two-fold challenge. However, using our state-of-the-art technologies and extensive expertise, we succeeded in creating an accurate and fast bearing inspection that was at par with the client’s expectations.
Our machine vision solution was capable of performing accurate defect detection and rejection of defective products. Some prominent features of the inspection procedure are following:
Capable of identifying NCU, shallow recess, grinding damage, and spiral defects with an accuracy of over 98%.
Eliminated the need for staffing out of the inspection loop.
Would enable considerable operational cost savings in the long run.
Enabled quicker turnaround with an inspection cycle time of 150-200 milliseconds.
In this blog post, we understood the fundamentals of bearings, the necessity of automated inspection and the different kinds of common bearing defects. We also discussed the issues one of our clients faced and how Qualitas Technologies helped in the creation of an apt vision system solution.